Simply Resourceful

Simple ways to be more conscious about how we use our resources.

How to Make a Cutting Board

Friends of ours recently announced they got married.  For a wedding gift we made them a cutting board using walnut and hickory wood.  The walnut was milled right here on our property.

The cutting boards were made from scrap pieces so the strips of wood are different widths.  And really, does it matter?  In the picture above, Jon is gluing the wood strips together. 

After clamping each cutting board overnight, the edges were squared off using the bandsaw.

To get a smooth, even surface, the cutting boards were put through the planer a few times. 

For a rounded edge, Jon used a router on all sides, top and bottom.

We used a scroll saw to remove the sharp corners and give them a rounded look. 

The bench sander allowed for easier sanding on the edges to get rid of irregularities from the router and scroll saw.

To seal the wood, I used spoon oil.  Spoon oil is made with beeswax and a neutral oil such as sunflower, safflower, soybean, flax, or canola.  Mineral oil is commonly used but it is a petroleum product.  I used safflower oil because it was in my cupboard.  I made a small batch of spoon oil with 2 ounces beeswax and 4 ounces safflower oil.  Each cutting board only needs about 2 teaspoons of the oil so the excess will be used on more cutting boards and wooden spoons.  This website gives step-by-step details for making spoon oil.

A little dab of spoon oil goes a long way.  I used a cotton cloth to massage it into the wood.

The above picture shows the difference before and after the spoon oil was applied.  The grain of the wood literally pops out at you!

The finished product!  Total time for this project took maybe 1.5 hours.  Cutting boards use up scraps and make excellent presents.  


How to Make Ginger Ale

Ginger Ale is so refreshing in the sweltering heat of summer!  Ginger ale was never my beverage of choice growing up, but now that we make our own, I am sold on it's tart flavor.  Since we use the actual ginger root in our recipe, every bottle is packed with health boosting properties ginger is known for including: soothing stomach upset, respiratory coughs, fevers, and more.  Knowing ginger is good for my body, I don't feel guilty sitting back and enjoying a bottle of our homemade ginger ale.

To make ginger ale, you first have to ferment the ginger root by making a Ginger Bug.  Unlike  berry and sarsaparilla soda that requires champagne yeast, ginger ale uses the natural yeast created from a ginger bug for its fizzy carbonation.


With a wooden spoon, stir the following ingredients into a pint mason jar:
-2T fresh ginger (Skin and grate - I use a micro-plane grater)
-2T unrefined cane juice sugar
-2T non-chlorinated water

Cover jar with a coffee filter secured with a rubber band.

Every day for at least five days, stir in 2T each of grated ginger, sugar, and water.  It should get bubbly and foamy. On the sixth day use what you need and refrigerate the rest adding 2T each of everything (ginger, sugar and water) once each week.  Cap jar loosely when refrigerated.


Once your ginger bug has fermented for six days, you can make ginger ale.

Ingredients:
2-4 inch piece of fresh ginger root, peeled and minced
1 cup evaporated cane juice sugar
1 cup fresh lemon or lime juice (~ 4 lemons)
1 tsp. sea salt
16 cups non-chlorinated water
1 cup homemade ginger bug

*makes 8.5 grolsch bottles

In a saucepan, add  6 cups water, minced ginger root, sugar, and salt.  Bring to a boil and simmer for about 5 minutes until sugar is dissolved and mixture starts to smell like ginger.

Remove from heat and add remaining water.  Cool mixture to room temperature.

Add fresh lemon or lime juice and ginger bug.  Stir.

Fill grolsch bottles.

Store bottles in cooler or cover bottles for several days until carbonated, and then transfer to fridge to drastically slow down the carbonation.  The reason we place the bottles in a cooler is to contain any liquid and glass that may explode in case the bottles carbonate too long.  When we first started making soda, we had a bottle explode all over the kitchen and freshly painted ceiling...a very sticky mess to clean up!

Besides water, there are only five ingredients in ginger ale.

Even though we use organic ginger, we grate it before dicing.

If you have a pirate on the premise, they should help juice the lemons to help fight scurvy!

When adding the lemon juice and ginger bug, make sure the water is not too hot (below 100 degrees Fahrenheit), otherwise you will kill the natural yeast in the ginger bug.

Using a fine mesh strainer helps produce a cleaner product. Then cap and vigorously shake the gallon jug for 20 seconds or so.

Use a funnel with a slight indent at the bottom so air can escape when filling the grolsch bottles. 

Almost finished...final capping of the bottles. 

To be on the safe side, we recommend storing the bottles in a cooler in case a bottle bursts. Check daily for carbonation.  Small bubbles forming on top of the beverage indicate carbonation is taking place.  If a quick rush of air escapes when you slightly loosen the wire barrel, then it's probably time to place the bottles in the refrigerator maybe slightly before then. We recommend that until you get used to how fast carbonation takes place (which is highly dependent on the ambient air temperature), that you have a test plastic soda bottle as a control bottle just so you know how fast they are carbonating.

Some sources I referenced when perfecting our recipe include: Wellness Mama and Nourished Kitchen.

Baker Creek Spring Planting Festival Expedition


My family just returned from a cross country vacation last week.  We saw many sites in several states, one being the Baker Creek Heirloom Seed Company in Mansfield, MO.  Attending the Spring Festival was our first visit to Baker Creek. This company has the largest selection of heirloom seeds in the country. At Baker Creek you can see the farm and pioneer village.  The village includes a seed store, herbal apothecary, bakery, an old-time mercantile, blacksmith shop, music barns, and much more.

Jon was in his element surrounded by nearly 1,800 different varieties of seeds!

The festival had thousands of attendees which made for some crowded situations.  At times it became a bit claustrophobic and nerve-racking keeping track of Paul in the crowds of people (thus the bright orange shirt to easily locate him).  This was the only down-side of the festival.  It's great that so many people want to join the festivities, but it makes it difficult to see everything. 

Paul really enjoyed watching the Blacksmith.

Crowds of people in Pioneer Village.  I like the windmill in the background next to the Livery Stable.


I took a picture of the lemonade stand next to the music stage because it was just too cute seeing the owner's daughter in a sundress serving customers fresh squeezed lemonade.  She is seen in several pages of the Baker Creek Catalog biting into delicious fruit and is the envy of Jon and Paul when they are perusing the catalog.  In the picture you can see Paul waiting to purchase a glass of lemonade. 

The Kids' Tent was bustling with activity the entire time with sack races, seed planting, games, and digging in a giant pile of sand. 


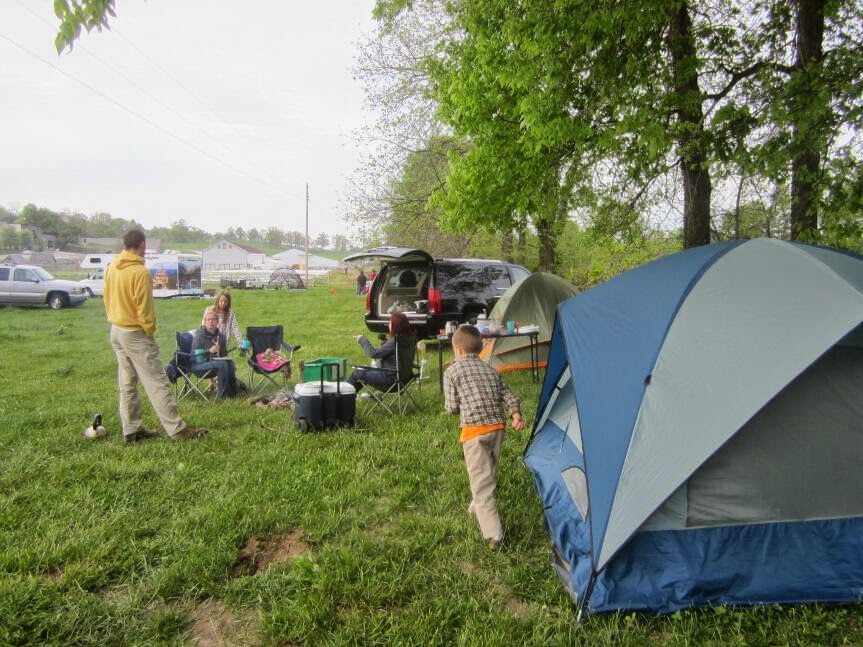
One aspect we thoroughly enjoyed at the festival was free camping on-site. We were very thankful that Baker Creek allowed attendees to set up camp in the cow pasture right across from the festival grounds.  There were even bathrooms with flushing toilets and showers!  Camping introduced us to some amazing people who shared common interests in gardening, essential oils, off-grid living, etc.  Campers were respectful of each other's space and quiet time and shared meals.  Bluegrass music filled the night air when falling asleep.  Overall we had a great time at the festival and will return again.

Planting the garden was our first priority after returning from our trip!  Using cattle panels as a trellis, Jon and Paul planted Asparagus Beans from Baker Creek.  This is our first year growing these beans and the pods grow to about 24 inches long!

This picture was taken from our second story bedroom window.  The little plot on the left is for sweet corn.  We are using row covers again this year to protect our brassicas from the cabbage worms, melons from the cucumber beetles, and eggplants from the flea beetles.  


Berry Scones Made With Oat Flour

We really love our grain mill and have been experimenting with different grains in our recipes lately.  One recipe that turned out perfectly with an alternative grain was scones.  In general, my scones are very moist and puffy like biscuits, but when I use frozen berries, the batter tends to be really wet and runny creating some unpleasant smokey smells from the oven from liquid dripping off the baking stone.  What a mess this creates and the scones are then over-baked.  To solve this problem, I discovered ground oat groats help absorb the excess moisture in the batter creating the perfect berry scones.  You have to try them!

Berry Scones:
1/2 cup all-purpose flour
1/2 cup wheat germ or flax seed meal
1 cup ground oat groats
1/4 c sugar
1 tsp. baking powder
1/4 tsp. baking soda
5 T frozen butter, grated
1/2 cup berries (frozen or fresh)
1/2 cup sour cream or plain yogurt
1 egg

Mix together flours, sugar, baking powder, and baking soda. 
Add grated butter to dry mixture using a pastry blender until it has a crumb-like texture.
In a small bowl, mix sour cream and egg together, add to above mixture.  Batter will be wet. 
Add berries and mix thoroughly.
Place mounds of dough onto baking stone, flatten the tops. 
Bake at 400 degrees for 15-20 minutes or until golden.
Optional: sprinkle sugar on top before baking.  


Making Peanut Butter with our GrainMaker Mill!

This is our first attempt at making peanut butter with the Grain Mill!  We ordered six pounds of nuts from freshroastedalmondco.com.  Organic unsalted peanuts were $4.86/pound.  

There are two separate augers for the grain mill.  The Coil Auger (on the left) is for small grains such as wheat, barley, and rice.  The GrainBreaker Auger (on the right) is for grinding corn, legumes, coffee beans, dehydrated foods, and nuts. For peanut butter we used the GrainBreaker Auger.

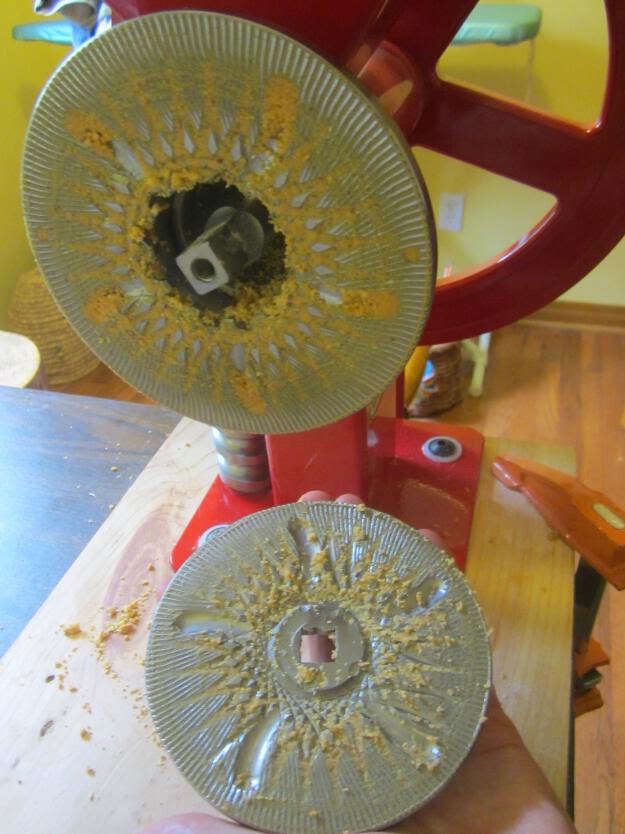
We were a bit apprehensive about using the grain mill for making nut butter because it seemed like a messy job.  Here is what the grinding disks (aka Burrs) looked like after grinding six pounds of peanuts. 

To clean the burrs, you simply grind some wheat berries.  It sounded too good to be true, but this is what the burrs looked like after grinding a half cup of flour.  (click picture to enlarge).  Voila!  The mill is clean and ready to go. We used the "peanut cleaning flour" in our favorite chocolate chip cookie recipe.  Grinding peanut butter was super simple and something we will definitely do again!


How to Pollinate a Meyer Lemon Tree


Three years ago we purchased several indoor citrus trees.  The time has finally come for one of the plants, the Meyer Lemon, to produce flowers.  It has been a typical spring with some cold days intermixed with a few warm days, so keeping the plant outside every day hasn't been an option.
Meyer Lemon Trees are for the most part self-pollinating, but if they are inside without wind or insects, they will need some assistance from the gardener.  We used a q-tip and lightly brushed the pollen from the stamens and then dabbed the stigma.  

And when the weather was warm, we had help from a few wild bees.  The blossoms are very fragrant so attracting pollinators isn't a problem.


Teaching Others About Gardening and Preserving Food


This week I helped my friend, Pam, teach a class on growing and preserving food at a local MOPS group.  This is the same place I taught homemade cleaning projects and soap making in 2014.  The group had a lot of great questions for us and there seemed to be a few interested in starting a small backyard garden and preserving food.

Years ago the very thought of speaking in front of a group sent me into panic mode; but now I willingly accept the invitation.  Why the sudden change?  I have learned that when I am passionate about something, the fear of public speaking goes away.  Teaching is probably my calling in life, but not in the traditional sense like a teacher in a classroom.  I get excited showing others the things my family does and the lessons we have learned.  To see someone else become interested in what we are doing is very satisfying.   

In one hour we covered a lot of topics including:

*Benefits of raising your own food
*Getting started
*Types of gardening (i.e. container vs. raised bed vs. tilled area)
*Canning
*Freezing
*Dehydrating
*Fermenting
*Where to purchase large amounts of produce (i.e. farmer's market, stores locally, neighbors, etc.)
*Benefits of joining a CSA (Community Supported Agriculture)
*Recipes


Pam gave everyone a packet of seeds to take home and we had a lot of stuff for them to look at.  We barely had enough time to cover all the topics and answer questions, but a handout was given to them before leaving.    


About this blog

A weekly update on our adventures of trying to be more self-sufficient by using resources wisely. We explore a variety of topics that most broadly fit in the "Homesteading" category, i.e. beekeeping, organic gardening, edible landscaping/fruit forest, food preservation/canning, woodworking, soap-making, and environmental stewardship.

Search My Blog

I've been featured on:


Followers

Facebook

Contact Form

Name

Email *

Message *

Powered by Blogger.