Simply Resourceful

Simple ways to be more conscious about how we use our resources.

Butternut Squash and Okra Fettuccini Recipe


Fall is here and the squash harvest is already in our basement.  This season we received 30 butternut squash from five plants.  Besides serving butternut squash in soup, we enjoy eating our butternuts with pasta.  I included the recipe here, but I want to stress that the measurements are estimates because Jon is more of measure-free kind of cook who adds ingredients based off how things "look".

Recipe (serves 4-6, takes about 20-30 min excluding the time to steam the butternut, but you can steam it while you're prepping the other ingredients):
1 small to medium-sized butternut squash (cubed and steamed)
6-10 okra pods sliced in 1/4 to 1/2" pieces
1/2 to 1 cup of diced mild peppers (green, red, or orange bell, use hotter peppers if you like heat)
1-5 cloves of garlic (optional)
1 cup of diced tomatoes
1 1/2 cups of milk
3/4 cup of half and half
3/4 cup of grated Parmesan cheese
1 Tbsp paprika
1 Tbsp thyme
1 tsp garlic salt
1-2 Tbsp Extra Virgin Olive Oil
1 lb of fettuccine (or your favorite shape)

Instructions:
1) Cube up your butternut squash and steam it for 20 minutes or until easily poked with a fork.
2) In skillet, over medium high heat add Olive Oil and saute garlic, okra, and peppers for 7 minutes.
3) Add tomatoes and saute for another minute or two
4) Add butternut, then turn down heat to low-medium and add milk, half and half and parmesan.
5) Cook sauce for a few minutes
6) Finally, once butternut is incorporated into sauce pour over fresh hot noodles


The butternut haul with some pie pumpkins in the basement.

Peppers and okra all cut up ready to add to the skillet

Adding the steamed and cubed butternut to the sauteed vegetables.

What it should look like after adding the milk ingredients and stirring


Voila!


Gathering Pawpaws and Spice Bush Berries


This past weekend my family joined a few friends at the Pawpaw Festival in Athens, OH.  A pawpaw is a fruit native to this region of the country and is a fruit that not many people have even heard about.  It's a fruit that is easily bruised and spoils quickly so it is not sold in stores.  What does a pawpaw taste like?  Well, there are many different varieties, but in general I think the creamy, custard interior tastes like a pineapple crossed with a banana.  The seeds are quite large and the germination rate is a less than 50% so it takes a lot of patience to grow these from seed.  Thankfully a lot can be found growing wild in the woods.  We discovered a few pawpaw trees on our property this spring and cleared out that area so they can receive more sun and grow bigger.

The festival is located on a lake where attendees can take canoes out for a paddle.  While coasting near the shoreline we came across dozens of pawpaw trees bearing fruit so we picked a few to bring home.  Good thing we picked some because the vendors selling pawpaws at the festival ran out of fruit before we bought some.  If you click the picture for enlargement, you can see a pawpaw in Paul's hands that he already bit into.  Some of these pawpaws were used in a cake and cream cheese frosting.

The seeds are quite large!

At the festival there is atlatl throwing.  Paul thoroughly enjoyed this activity and was very good at it.  Basically you throw darts with a wooden spear thrower.  It looks easy, but it takes a bit of coordination, technique, and a lot of aim. 

One spice that is often used with pawpaws is the spice bush berry.  They are very plentiful in our woods. What do they taste like?  Allspice

Only a few berries are needed in a recipe.  They can be chopped or ground up.

The seeds inside can be eaten, but if you can't grind them up, the shells are fine by themselves. 


Handmade Aspen and Walnut Hutch

Some of you may remember last year's post about us milling a walnut log that we found on our property. With most days this summer being too wet to work in the garden, we had a lot of time in the woodshop to work on the hutch.  The light colored wood is aspen that we gathered during our stay in Wyoming back in 2005/2006.  The dark wood is black walnut that we gathered here on our property in West Virginia in 2012.  I think most will agree that the colors compliment each other very well.  We took a lot of pictures along the way to share with you!

The "bones" of the hutch were made out of 2x4's that Jon ripped into 2x2's.  This is our first piece of furniture not made with only logs so we improvised on what we thought would be structurally sound.  To add stability, triangles were added in the corners to keep the structure from shifting.  

Squaring up the board using the bandsaw.

Jon using the jointer to take away imperfections on the edges.

The drawers are now assembled and installed.  

We're seeing progress with a side panel and cupboard doors.

Jon is taking apart pallets.  The pallets will be used for the bottom and the shelf inside the hutch.

A view from the back before the back panel is attached.  Only one side has a shelf because the other side will store flour buckets.

To avoid skitter marks that often occur when using an electric sander, I decided to sand everything by hand.  Thankfully there wasn't much to sand because the planer did a really good job making everything smooth.

The drawers now have fronts.  Small branches were used for the drawer and cupboard handles.

Attaching hinges is a lot more difficult than it looks.

This is what I used to seal the wood to give the hutch a more natural look; it contains linseed oil and beeswax.  This is the same stuff I use on wooden toys.


The hutch is in its final resting place in the dining room.  Small logs were used as "legs" to raise the hutch off the floor a few inches.  I think a different paint color would make this hutch really stand out!


Jon wood-burned this sign and attached it inside the hutch.

It took about 3 months to build the hutch (not counting the time to collect the logs, shave the bark, and mill the logs into boards).  Making furniture from scratch with actual logs verses boards that are cut to perfect thickness and width takes a lot of time.  Every time we make a piece of furniture I think how fortunate we are to have power tools to make the job easier.  We have been told dozens of times that we should sell furniture, but I don't think most people would pay the true price for handcrafted furniture.  Like most things handmade these days, you just can't get reimbursed for the time.


Combining Two Hives & Wax Moths

After the honey harvest in late July I didn't have any plans to go into the hives until September to check honey stores for the winter.  Big mistake...with the wet summer we've been having, the honeybees have struggled to find nectar sources sufficient enough to bulk up their food stores.  One would think that a lot of rain means a lot of flowers, but what we forget is that rain washes away the nectar from the flowers and/or dilutes it. The second week of August I noticed some changes to the hives.  There was a lack of activity coming and going from the hive and I could actually hear an audible angry buzz coming from within the hive.

Doing a quick inspection showed me that one hive was completely queenless with NO brood but sufficient honey stores (ironically this was the hive we stole honey from, but perhaps they robbed from the other hive even with entrance reducers in place).  The second hive that was a new package this spring had a queen and a patch of brood about the size of a softball but absolutely NO food sources.  What an odd combination: one hive with a lot of food stores but no queen and the other hive with a laying queen but no food.  It didn't take long to decide that I should combine the two hives and make one colony.  Normally a beekeeper would use the newspaper method poked with holes to combine the two hives, but I thought we were in dire circumstances and just combined the two and filled their feeder.  An inspection a week later showed more brood and eggs, and this week normal activity outside the hive.  I think I may have intervened at the nick of time before both colonies failed.  The chances of this hive surviving the winter?  We'll see...

This pictures shows typical signs of a queenless hive: spotty drone brood which indicates one of the workers is laying unfertilized eggs.  Notice the capped honey in the corners of the frame. 

I took this picture a week after combining the two hives.  I was happy see eggs and larvae which hopefully indicates the queen has been accepted by the new colony and is healthy.

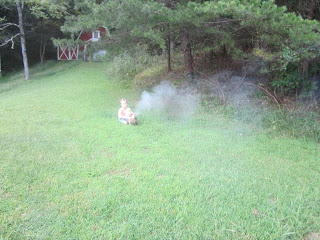
After we're finished inspecting the hives, Paul likes to puff the smoker!

Another sorry end to this post is the discovery of wax moths in the supers we removed from the hives when combining them.  This was first year wax and has now been eaten up by the darn wax worms.  I have never had a problem with these in the past but when colonies are weak they can't fight them off.  At what point does a beekeeper just scrape off the wax and start over?  Only one frame was really infested so I will scrape that one but the others I was thinking of leaving for the bees to clean up next spring.  Thoughts anyone?  In the past I had managed to find room in the freezer to freeze the frames before winter storage, but this year the freezer is packed to the gills.  Well, now that the frames are infested I managed to remove a few steaks for dinner to fit one frame in the freezer at a time.  Before freezing I banged the frames against the cement and the worms fell out.  What a pain.  Jon did capture a pretty good video showing the larvae burrowing in the comb.  See below!


Picking Orphan Fruit Trees and Bushes


You know you've seen them alongside the road...just standing there with its branches weighed down from the sweet orbs waiting to be picked.  We call these trees "orphans" because each season their fruit drops to the ground and is only enjoyed by the animals and bees.  This time of year my family sees orphan fruit trees every where we go.  Paul spies them usually before us because he doesn't have to concentrate on the twisty one-lane roads around here.  It's easy to say, "Just knock on the homeowner's door and ask if you can pick their tree," but if you're like me, you may be a bit shy and fear the possible "NO!"  Come to find out, every time we have asked to pick someone's tree, we have been told, "Oh please pick as many as you can!!"  And more than one time we have been told, "I don't like those apples and we just mow over them...they are such a nuisance!"  When you begin telling friends and neighbors that you preserve a lot of fruit and enjoy picking it, most likely they will recommend people who have excess to share.  It's nice having others brings news of fruit to be picked without you doing all the leg work!  My family has been picking orphan fruit trees and bushes for 6 years and here are some suggested guidelines we would like to share with readers:

1. Is the area contaminated?  Don't pick next to a busy highway or a creek that receives storm water runoff.

2. Is the fruit area sprayed with fertilizers, pesticides, and Roundup?  A quick glance at the grass and surrounding area will give you a good indication of this.

3. Is the fruit tree sprayed for pests?  We have asked this question to homeowners and chances are if they don't eat the fruit, the tree isn't sprayed.

4.  Are you sure no one wants the fruit?  We do a few drive-byes to see if there is fruit lying on the ground rotting.  Chances are if the fruit is constantly being picked up, the homeowner is using them.  But you may want to ask anyway in the off-chance the fruit is being removed so bees aren't attracted to the rotting fruit.

5.  If possible try not to bring a ladder.  With so much hype about lawsuits these days, you don't want to scare a homeowner with the possibility that you may fall off and break something.

6.  Offer the homeowner something in return for the fruit.  Some people don't have the time and/or motivation to make a pie or applesauce but would love some in return for all the apples you take.  Offering a service or other produce item in return is also thoughtful.  In most cases I give a jar of applesauce and cider as a way of saying thanks.  It also helps secure picking for next year!  : )


This past week we picked 3 apple trees and even went back for seconds! The first tree was picked in a neighborhood and we made 6 attempts to contact the homeowner because they were never home when we stopped by.  The persistence paid off and we hauled away a lot of apples!

These two trees were next to a church playground and behind a tanning salon.  It took 5 phone calls to locate the owner of these trees.  As tempting as it was to just go ahead and pick them without permission because they were off the main road, I didn't want to get caught for trespassing.  Afterall, I want to make friends with these people so we can pick for many more years!

We don't know what variety the apples were but we really enjoyed them and may graft a branch this winter. 

Paul likes to sample the apples!

To fit as much as we can in our small car we lined the trunk with a tarp.  All together we filled 13, 5 gallon buckets for an estimated weight of about 300 pounds!

If you click the picture (for enlarging) you will still see the tree still full of apples.  We went back for a second picking a few days later. 

Paul is taking a peek at the apples in the trunk and finding the best one for sampling on the way home. 

In one day we processed all of the apples: apple butter, apple sauce, apple cider, apple wine, apple pie, apple crisp, and dehydrated apples.  The next batch of apples was made into cider vinegar, hard cider, pies, and more dehydrated apple slices.  We are curious to see how long the apples will keep in our basement so we stored a couple dozen down there.  Currently the basement is 64 degrees without an air conditioner and the main living area is 80 degrees. 

Happy picking!


About this blog

A weekly update on our adventures of trying to be more self-sufficient by using resources wisely. We explore a variety of topics that most broadly fit in the "Homesteading" category, i.e. beekeeping, organic gardening, edible landscaping/fruit forest, food preservation/canning, woodworking, soap-making, and environmental stewardship.

Search My Blog

I've been featured on:


Followers

Facebook

Contact Form

Name

Email *

Message *

Powered by Blogger.