Simply Resourceful

Simple ways to be more conscious about how we use our resources.

2013 Garden and Homestead Review


Fall is here and while there are a few items left in the garden, I decided to tally up our stash for the winter. Keep in mind that what I've listed is what we put up for the winter.  I didn't include all of the
fresh produce we ate throughout the summer (e.g. peas, cauliflower, tomatoes, lettuce, beans, etc.).

If you've been following this blog for awhile, you may remember the post about record keeping and having a preservation log.  This binder is a must-have for me and helped me put together this list in about 5 minutes.  I also posted about the canning shelf last year which makes organizing your canned goods so much easier if you have the space.  Overall Jon and I say we had a very successful year despite the wet conditions that rotted all of our root crops. Thankfully we have carrots left over from the previous year and the third planting may survive into the winter with enough mulch.
If there is one thing I have learned from homesteading it is this: always think ahead and prepare more than you need because you never know what the following year will bring.  You just can't predict the weather, the pests, your health, and everything else. This summer I had an appendectomy and threw out my back and was basically unable to help Jon for 10 weeks this summer.  Thankfully my husband shares the workload, otherwise the garden would have never happened.  With so many unknowns, you can never really have enough excess; and don't forget about all the jars that will be given away to friends and family!  : )
  • 85 bulbs garlic (10 bulbs will be used for seed)
  • 14 meals of frozen corn (7 full quart bags)
  • 10 pie pumpkins for eating (15 for decoration)
  • 30 butternut squash
  • 58 quarts bush beans
  • 31 quarts, 10 pints stewed tomatoes
  • 22 pints tomato soup
  • 25 half-pints tomato paste
  • 35 pints salsa
  • 12 half pints green tomato hot dog relish
  • 3 quarts tomato juice
  • 4 pints, and 7 half-pints strawberry jam
  • 1 gallon strawberry wine (5 bottles)
  • 1 gallon freezer bag srawberries
  • a lot of strawberry soda and mashed strawberries in freezer for ice cream etc.
  • 26 quarts peaches
  • 15 quart bags frozen peppers (sweet green, beaver dam, poblano)
  • 1 gallon peach wine (5 bottles)
  • 1 gallon pumpkin wine
  • 31 quarts applesauce
  • 5 pints apple butter
  • 21 quarts apple cider
  • 1 gallon apple wine
  • 3 gallons hard apple cider
  • 3 gallon jars of dried apple slices
  • 5 gallon bucket of hulled walnuts, butternuts, and hickory nuts
  • 20.25 pounds honey
  • Updated 11-30-13   
    • 14 pints venison
    • 13 pounds ground venison burger
    • 2 frozen venison roasts
    • 1 batch venison jerky
Golden peaches in jars don't last long!


This summer marked our first honey harvest!

The rains really flooded our seasonal creek and the culvert couldn't keep up with the water so it went over the road.  Neighbors who have lived here 35 years have never seen it flood like this before. 
With the flooding, many skunks were out digging at the ground eating the grubs.  They were up by the beehives but left them alone because there were so many grubs in the ground coming to the surface from all the water.  The flood was dubbed, " The Two Skunk Flood" by Jon's coworkers (kind of an inside joke).

We added 3 barred rock chickens to the coop this year which has been exciting!  They are a bit more skittish around us, but they are beautiful and can be hard to find when they're free-ranging in the woods...
The chicken coop now has 6 chickens.  We're still waiting for 2 of the barred rocks to begin laying.  Last year all of the golden comets were laying before the end of August, and here we are in October and the barred rocks haven't really started.  Not sure what that's all about?


Paul really helps us with the chickens.  He lets them out, puts them away, and helps with feedings and filling the outdoor run with leaves.  If anything, he has socialized them and made them gentle to handle.  Above is a picture of Paul holding our favorite chicken (affectionately named Turkey)...she is the head chicken in the roost who seems to always get more than her fair share of the scratch, crawfish, mice, and assorted grubs we give them as treats.

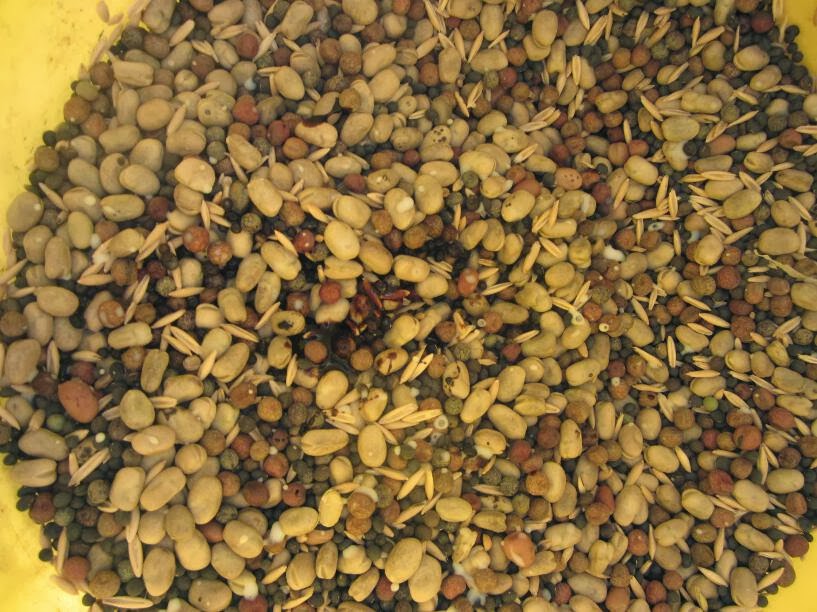
The green manure is filling out very nicely.  This past weekend we planted the final few rows!  Everything has been put to bed for the year and Jon anxiously waits for the seed catalogs to start arriving!


A Large, Cheap and Easy Greenhouse For Under $300

The finished product
We've battled for years about spending a lot of money on a greenhouse. Most greenhouses that fit our growing needs cost $2000-4000. We just couldn't bring ourselves to cough up the money for that. Then Jon came across a Youtube video that used cattle panels as the skeleton and voila, we had a weekend project. The video that Jon watched will about make you nauseated (the camera jumps around everywhere) so we fast-forwarded through it and got the basic idea and went to town improvising the rest.  In the end, what we came up with has turned out to be fabulous and only cost us about $255.80.

Dimensions: 16 x 8 feet of growing pleasure
20x20' of greenhouse plastic*- $62.80 
2 Earth Anchors - $14
14 - 2x4x8's ($3/board) - $42
15 haybales - $45
Barrel Latch to hold window - $3
4 - 16x4' Cattle Panels: $80
24 - zip ties - $3
1 lb - 2 1/2" Wood Screws - $6
10' of pretty thick wire -  Leftover from another project
1 - Pipe insulation foam - Leftover from another project
10 Concrete blocks - Free - found them on the property
2 door hinges - Free - found them in a box of misc parts
5 old windows - Free - re-used from our previous home
Misc. scrap pallet wood - Free
* from Peaceful Valley Farm & Garden Supply (RPK Tufflite IV) 
Leveling the foundation.
Notice the braces on the corners---they help with stability.

A trial set up in the garage. This was key in getting the length and angle for the support posts. To make the angle right, we held the full length 2x4 up and penciled the angle onto the 2x4 where the cattle panel intersected it.

Zip ties add stability between each panel.

Pipe insulation helps keep abrasion between plastic and panels to a minimum.
The skeleton is ready for plastic.

Earth anchors with old electric fence wire keep the structure anchored to the ground in strong winds.

Using the cinder blocks to raise the greenhouse off the ground allows Jon to stand up without hunching over.  The cinder blocks also keep the wood off the ground so they won't rot.  We did not use treated lumber. 

Looking good, we need some doors now.  Logs temporarily held the plastic down until the haybales arrived.
We probably didn't buy enough plastic (25 feet may have been a better choice), so we improvised.  We had some old windows laying around for cold frames and they happened to be wide enough to fill the door gap, so we just framed them in with 2x4's. We used scrap pieces of wood to ensure they didn't fall out and those subsequently also doubled as door handles.
Inside looking out the front door.

Blocks of wood screwed into cross pieces held the plastic in place. 

A latch was added to the back window for easy removal when we need more ventilation.

A view looking at the back window from the inside.

This is our Listada Vi Gandia Eggplant.  All but one plant died this summer from flea beetle damage.  This one finally made flowers, but now it's too cold to produce so Jon transplanted it inside the greenhouse and it is thriving!

Our friends who helped deliver the cattle panels in the back of their truck had a great idea  to use hay around the perimeter as insulation.  After a year of rain they will be added to the garden as mulch and replaced with new bales.
So majestic..


Dealing with Termites

Less than a year after purchasing our home we found a spot in the floor of the breakfast room that heaved a bit.  We figured it was from moisture and the fact that the installer nailed this "floating floor" around the edges which created the bulge.  Well, Jon decided to replace the 3 boards that were ruined (thank you previous owners for leaving extra flooring!) and when he opened the floor, this is what he found...

Lovely...and there were termites crawling around.  Apparently they eat sub-flooring because you can see it crumbled to pieces. This small 8x10 room has a crawlspace (the only part of the home with a crawlspace) and it is very damp under there because there isn't cross ventilation and the previous owner didn't cover the entire space with plastic.

We decided to remove ALL fiber material (e.g. cardboard) and wood from under the porch including the woodpile left by the previous owners.  We stacked it far from the house and sure enough those logs were light as feathers and infested with termites.  We call this our $1,000 wood pile.  The wood will be used this winter for maple syrup boiling. 

We chose to use the Sentricon protection system for our home instead of dumping gallons of pesticides into the ground.  The Sentricon system is a bait that entices the termites to eat the food that prevents them from molting which kill the worker termites and eventually the entire colony. 

Our tropical plants are looking great for their first year!  After transplanting and watering, Jon noticed termites in the soil!!!

In the picture above, Jon and Paul are sifting through the soil and smashing the termites.  Just our luck...there was a small hole in the bag of soil that was stored under the porch.  The termites were eating the wood chips in the soil. 

A close-up of a termite in the potting soil. 


Planting a Green Manure/Cover Crop


This year we finally got our ducks in a row and planted a green manure (aka cover crop) in the garden.  It's the last "hurrah" in the garden before winter and gives a gardener a feeling of relief that the harvest season is now over and hope that next year's harvest will be even better!  Jon says, "It's like giving the garden a blanket for the winter."  Without green manure/cover crops, the garden lays open to the elements where weed seeds can land and the wind and rain can wash away the topsoil.  It's a simple way a gardener can give back to the soil after the harvest.

Green manure is planted in the fall and remains in the garden until spring when it is mowed and tilled under. There are many benefits to planting green manure including:
  • adds nitrogen
  • adds organic matter and humus content
  • suppresses weeds
  • provides some erosion control
  • increases microbial activity in the topsoil
  • provides competition for weed growth
  • breaks up subsoil and clay layers for increased water and air penetration

We purchased our cover crop from GrowOrganic.com  The mix consists of: bell beans, peas, purple vetch, hairy vetch, common vetch, and cayuse oats.  The seeds were purchased "raw" and coated with N-Dure, a bacteria that coats the seeds to stimulate nitrogen production.

We purchased 20 pounds of seeds and enough bacteria to treat 50 pounds of seeds.  We used more bacteria inoculate than was required because this is the first time our soil has been planted with a green manure and we don't irrigate our garden in the winter.  Total cost was: $32.00

Seeds...

The best way to make the N-Dure bacteria stick to the seeds is add about 1 cup milk and 1 tsp. of molasses to about 10 pounds of seeds.  Everything was thoroughly mixed together and immediately planted in the garden.  While Jon sprinkled the seeds, I covered them with dirt using a garden rake.  It's important that the seeds are kept in the shade and covered right away because the bacteria dies when exposed to sunlight. 

Seeds after bacteria inoculation.

The soil was roto-tilled; weeds removed; and soil mounded into hills.  In the picture Jon is using a hand trowel to sprinkle seeds.

Two weeks after planting.  We are doing an experiment with mulching between the rows to keep weeds down.  About 5 layers of newspaper were covered with straw.  This picture only shows about 1/4 of our actual garden. 

A close-up of the green manure three weeks after planting. 


About this blog

A weekly update on our adventures of trying to be more self-sufficient by using resources wisely. We explore a variety of topics that most broadly fit in the "Homesteading" category, i.e. beekeeping, organic gardening, edible landscaping/fruit forest, food preservation/canning, woodworking, soap-making, and environmental stewardship.

Search My Blog

I've been featured on:


Followers

Facebook

Contact Form

Name

Email *

Message *

Powered by Blogger.