Simply Resourceful

Simple ways to be more conscious about how we use our resources.

Showing posts with label Grain Mill. Show all posts

How to Build a Bicycle Powered Grain Mill


This little contraption has become one of the most fun things to do in our house - especially in the winter. It is our own personal exercise bike, but with the added benefit that our spent energy goes into grinding various kinds of wheats and nut butters. If you've ever tried to grind wheat into a fine powder, it's a chore! This contraption makes it easy and quick.  I can get the wheat flour so fine that I can use it as a 1:1 substitute for all-purpose flour which is saying something!

I looked far and wide for plans on how to build a bicycle powered grain mill and just couldn't find anything out there.  So, I decided to build my own.  The best part about my design is that it is a variable speed design - you can shift gears and grind as fine or as course as you want with very little effort. There's a couple of key concepts that you need to remember.
  1. You're dealing with a lot of force, so 2x4's are the minimum size board I would use.
  2. The force is being applied in different directions, so you have to account for the different pulls and pushes
  3. Every bike size is different, so there's not a one size fits all design, so I will not give measurements, but rather show you the techniques and components that I used to make a working human powered grain mill.
Components:
  1. Grainmaker Mill - $700 - we chose the model no. 99. So far it has performed spectacularly and is well worth the ~$700 price tag. Though any mill with a V-belt wheel drive should work.
  2. Sprocket - $4 - The most difficult piece to figure out of the whole setup. The problem is I could not find anyone who makes a sprocket that fits a standard bicycle chain and that will connect to a 5/8" keyed shaft.
  3. Old bicycle rear wheel sprocket - free or find an old back tire at a yard sale.  You will have to take it a part and get the sprocket off. Weld this onto the sprocket that you buy above. If you don't have a welder, have a friend weld it like I did. It takes about 10 minutes to get the sprockets lined up just right, but this has to be precise. If it's not, your chain may fall off of the sprocket.
  4. 5/8" keyed shaft - $20 - This is used to drive your V-belt pulley
  5. V-belt pulley - $30 - This is used to drive your grain mill wheel
  6. V-belt - $10 - I used one off of an old lawnmower.
  7. A bicycle chain (in addition to the bicycle - that is you will have 2 chains) - $6
  8. 5/8" Bore Diameter Pillow blocks (2) - $24 - Used to hold the 5/8" keyed shaft.
  9. Bicycle stand - This lifts the rear wheel off the ground and keeps the bike and mill from shifting left or right. I found mine at a yard sale, but you can get a cheaper one for $20.
  10. 2x4's (3 to 5) - $8-12 worth. I use them all over for bracing.
  11. Quite a few screws...put one in if you feel any give
  12. A multi-speed bicycle: free to a couple of hundred dollars. I'm using Holly's bike.
Total setup cost including mill: $850-900

Steps:
First make a stand for your grain mill to sit on. I reused the same stand that we use for our honey extractor. The eventual height of the grain mill wheel should be approximately at the height of your rear bicycle sprocket to prevent the mill bouncing up and down. As you can see from the first picture, it doesn't have to be fancy, it just needs to hold the screwed down mill.  Position the mill towards the side of the stand, so the drive belt doesn't get in the way and this also allows for better placement of 2x4's when counteracting the side-to-side forces.

Top down view showing placement of 2x4's to prevent side to side forces. Notice how they attach to the bike stand.


Put your bicycle on the stand and shift up to the largest sprocket. Loop the second chain around the smallest bicycle sprocket (you may need to take the wheel off to put it in there) and extend it out towards the pulley.
You're going for something that looks like this.
Once you have that done, you can get a pretty good estimate of where to place the pillow blocks, so that tension is tight on both the chain and the belt leading to the grain mill. It took some trial and error, but I eventually got it in the right position and made a quick frame out of 2x4's and screwed it together. The frame requires a place to screw the pillow blocks in and also a vertical support that touches the ground to prevent bowing/bending in the vertical direction. Also, be sure to have the chain lined up as straight as possible. The less angles in chains and belts the better.
Pillow blocks, keyed shaft, sprocket, chain, v-belt pulley all working together to drive the mills wheel.
If you look closely, you can see the welds that connect the industrial sprocket to that of the old bicycle sprocket. Your bike chain goes on the old bicycle sprocket. Finding this trick was the most difficult part of the design.

Here's another view. Notice the notch for the chain so it doesn't rub.

Front to back, notice the braces that connect to the bike stand. They keep it from shifting side to side.


Notice notches in 2x4 to cradle the bike stand cross bar. This is an important cut, don't cut your 2x4 too short - this adds stability in the side-to-side direction. Also notice the vertical support that touches the floor.

 Finally, here's a video showing the bicycle powered grain mill in action.


Uses For Sorghum

This is our second year growing sorghum just for the fun of it.  We planted about two dozen seeds because their corn-like stalks grow about ten feet tall producing beautiful, burgundy seed heads.  We don't have enough stalks to make the sweet sorghum syrup but the flower heads themselves have many uses.  They are great for decoration, popped for eating, ground into flour for baking, a substitute for cooking, and sprouted for salads.  In an effort to educate and inspire others, I sold some at The Wild Ramp where I volunteer. 


The seeds easily come off the stalk.  To separate the chaff from the seed, rub the seed on a screen and then blow lightly over the seed.  

Popped sorghum is very small compared to popped corn.

We made flour with some of the sorghum using the grain mill.  

To filter out the chaff we used a sifter for a cleaner product.


From the two pictures above you can see the difference in Bob's Red Mill Sorghum and ours.  Our variety was Red's Red Sorghum. 


Pedal Powered GrainMaker Mill

After months of hand cranking flour and peanut butter, Jon scrounged up the parts needed to make the grain mill pedal powered!  The parts were purchased used for about $25.00 and it took about two hours to put together.  There are still a few minor tweaks to figure out, but it's a good first step!  More details about this contraption in the video.


Berry Scones Made With Oat Flour

We really love our grain mill and have been experimenting with different grains in our recipes lately.  One recipe that turned out perfectly with an alternative grain was scones.  In general, my scones are very moist and puffy like biscuits, but when I use frozen berries, the batter tends to be really wet and runny creating some unpleasant smokey smells from the oven from liquid dripping off the baking stone.  What a mess this creates and the scones are then over-baked.  To solve this problem, I discovered ground oat groats help absorb the excess moisture in the batter creating the perfect berry scones.  You have to try them!

Berry Scones:
1/2 cup all-purpose flour
1/2 cup wheat germ or flax seed meal
1 cup ground oat groats
1/4 c sugar
1 tsp. baking powder
1/4 tsp. baking soda
5 T frozen butter, grated
1/2 cup berries (frozen or fresh)
1/2 cup sour cream or plain yogurt
1 egg

Mix together flours, sugar, baking powder, and baking soda. 
Add grated butter to dry mixture using a pastry blender until it has a crumb-like texture.
In a small bowl, mix sour cream and egg together, add to above mixture.  Batter will be wet. 
Add berries and mix thoroughly.
Place mounds of dough onto baking stone, flatten the tops. 
Bake at 400 degrees for 15-20 minutes or until golden.
Optional: sprinkle sugar on top before baking.  


Making Peanut Butter with our GrainMaker Mill!

This is our first attempt at making peanut butter with the Grain Mill!  We ordered six pounds of nuts from freshroastedalmondco.com.  Organic unsalted peanuts were $4.86/pound.  

There are two separate augers for the grain mill.  The Coil Auger (on the left) is for small grains such as wheat, barley, and rice.  The GrainBreaker Auger (on the right) is for grinding corn, legumes, coffee beans, dehydrated foods, and nuts. For peanut butter we used the GrainBreaker Auger.

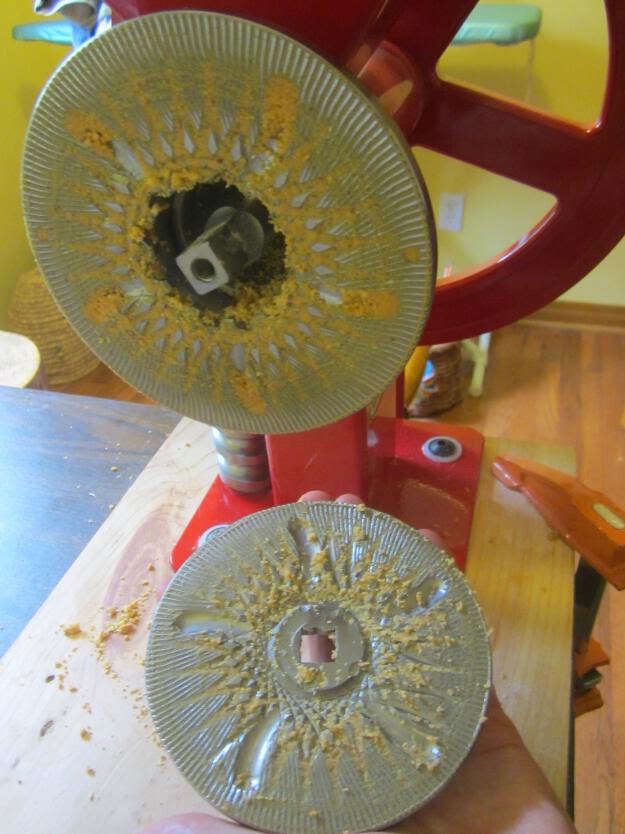
We were a bit apprehensive about using the grain mill for making nut butter because it seemed like a messy job.  Here is what the grinding disks (aka Burrs) looked like after grinding six pounds of peanuts. 

To clean the burrs, you simply grind some wheat berries.  It sounded too good to be true, but this is what the burrs looked like after grinding a half cup of flour.  (click picture to enlarge).  Voila!  The mill is clean and ready to go. We used the "peanut cleaning flour" in our favorite chocolate chip cookie recipe.  Grinding peanut butter was super simple and something we will definitely do again!


Valentine's Day Grain Mill Gift!

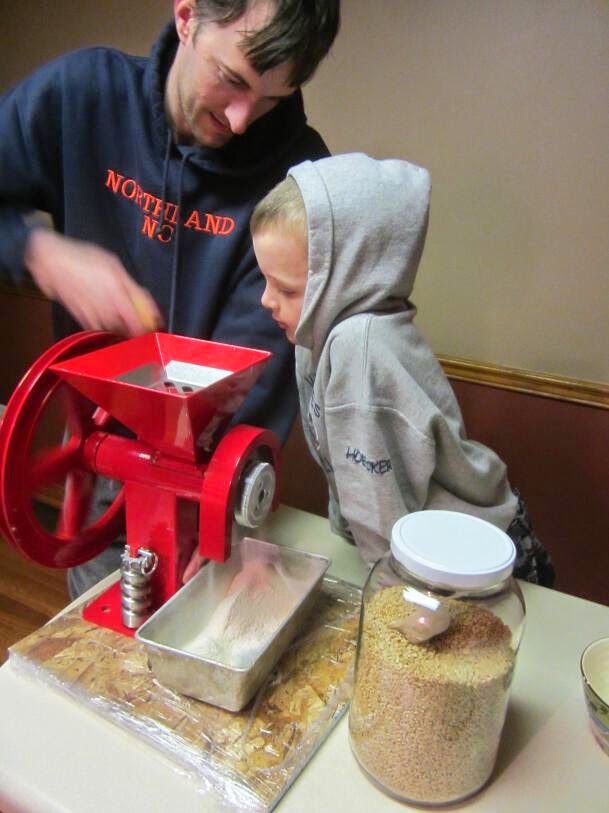
What says, "I love you" more than a grain mill?  This Valentine's Day the boys gifted me this awesome GrainMaker grain mill.  We just love homemade bread, noodles, hot cereals, and baked goods.  Grinding our own flour is the next step in having more whole grains in our diet.

Straight out of the box we couldn't resist grinding a cup of flour.  Paul was thrilled to pour in the wheat berries and turn the big "pirate wheel." 


We have the GrainMaker Grain Mill Model No. 99 which can grind grain, seeds, legumes, and nuts.

All I have to say is that we are impressed with our american made grain mill built in Montana.


About this blog

A weekly update on our adventures of trying to be more self-sufficient by using resources wisely. We explore a variety of topics that most broadly fit in the "Homesteading" category, i.e. beekeeping, organic gardening, edible landscaping/fruit forest, food preservation/canning, woodworking, soap-making, and environmental stewardship.

Search My Blog

I've been featured on:


Followers

Facebook

Contact Form

Name

Email *

Message *

Powered by Blogger.