Simply Resourceful

Simple ways to be more conscious about how we use our resources.

Showing posts with label Made in USA. Show all posts

Valentine's Day Grain Mill Gift!

What says, "I love you" more than a grain mill?  This Valentine's Day the boys gifted me this awesome GrainMaker grain mill.  We just love homemade bread, noodles, hot cereals, and baked goods.  Grinding our own flour is the next step in having more whole grains in our diet.

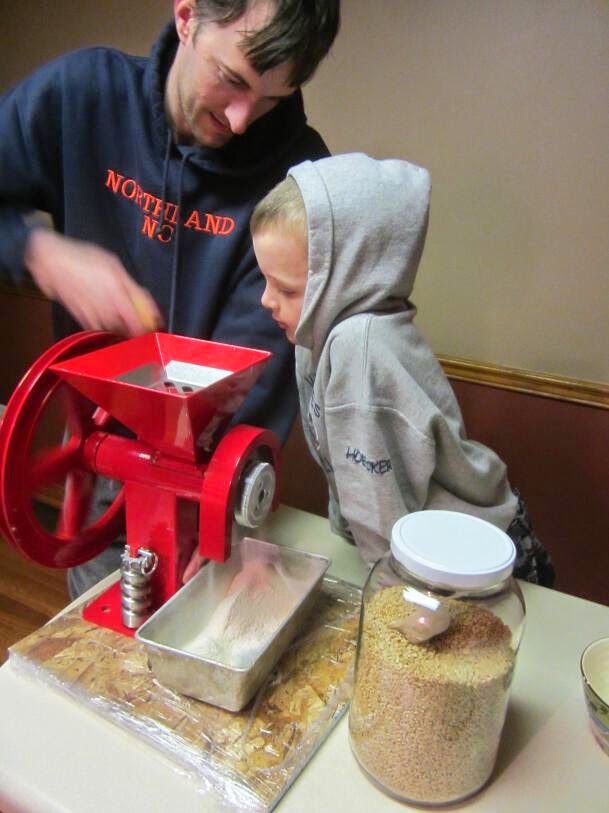
Straight out of the box we couldn't resist grinding a cup of flour.  Paul was thrilled to pour in the wheat berries and turn the big "pirate wheel." 


We have the GrainMaker Grain Mill Model No. 99 which can grind grain, seeds, legumes, and nuts.

All I have to say is that we are impressed with our american made grain mill built in Montana.


Using Snow For Homemade Ice Cream

This February we received about 10 inches of snow over a few days.  We live in the Mountain State so we don't have to go far for a good sledding hill!  

Even though it's cocoa season, we couldn't resist bringing out the ice cream maker.  We haven't purchased ice cream in at least five years and find the store varieties way too sweet for our liking, not to mention all of the unnecessary additives our bodies don't need.  Snow is free and the best thing to use for keeping the cream cold while churning.  Our ice cream maker is an antique White Mountain hand crank churn we found at a flea market.   It is Made in the USA,  We have our churn sitting inside a 5 gallon pail because there is a crack on the bottom that leaks water.

After 30 minutes or so of churning the cream is starting to thicken. 

The key to using old churns is to submerse the entire bucket in water for at least 24 hours before using it so the wood slats swell and hold the ice water.  As you can see, even with a slight crack, the pail still holds the ice water pretty well.  It took five days for the pail to dry out again.

Yum...mint chocolate chip ice cream!  There are recipes using snow with the milk, but we prefer the recipe found on the back of the Morton Ice Cream Salt box.  We reduced the recipe by half with a few other slight variations:
 Recipe:
1 1/4 cup granulated sugar
1/2 T lemon juice
1/8 tsp. salt
3.5 cups heavy whipping cream (local Homestead Creamery brand)
 1 cup whole milk (Whole Creamline Milk Homestead Creamery brand) 
 1 tsp. vanilla extract
2 tsp. mint extract 
2 drops green food coloring
1.5 cups chopped chocolate chips (Ghirardelli Bittersweet chocolate). 

According to several websites, this White Mountain Ice Cream churn was made in 1923.  More than 90 years and the thing still works!  I can only imagine how many revolutions that handle has had in its life so far.


A Knife Made By a Local Blacksmith


We had the privilege of meeting our blacksmith neighbor, Charlie, two years ago at a festival.  Jon and I were mesmerized watching him hammer away at a red-hot piece of metal while talking to others about the art of blacksmithing.  He had an infectious personality with a knack for educating others and we just had to talk to him.  Some time during our conversation with Charlie we learned that we only live about a mile from each other!  Charlie and his wife Evelyn, are one of those neighbors you are happy to wave to when they drive by, and they never miss a honk of the horn when they see us.  They are pretty awesome people to know, and give more than a generous amount of their time volunteering at the Heritage Farm Museum in Huntington, WV.

When I asked Charlie how he learned the trade of blacksmithing, he said, "I just taught myself along the way.  If you want to learn something, you can find the information in a bunch of places.  Don't be afraid to fail."  Charlie is truly an inspiration with a myriad of knowledge.  Him and his wife built their own home here in West Virginia using their own mill and have a lot of general knowledge about the area and homesteading.  Before leaving West Virginia, I wanted to take something unique with me from the area, so I asked Charlie to make us a functional knife, not just something decorative.  The knife handle is made from myrtlewood, a native evergreen from Oregon that a deceased friend (and coworker) gave to us during our five year stay in Portland, OR.  We have carried this block of wood with us for years, reserving it for something special because it is a unique hardwood from a special friend.  The seven inch hand-forged blade is 51-60 steel.  The sheath was hand-stitched by Charlie as well.  All together, the knife is a blend of OR and WV.

The knife and sheath.

A close-up of the knife handle with his trademark showing on the end of the knife blade.  A large C and B for Charlie Bradley.

A stamp on the blade that reads "C. Bradley Culloden, WV."


It's nice that Charlie stamps the knife with the type of steel used: 51-60.

Knife length.

The leftover chunk of myrtlewood the handle was made from.


The blacksmith shop.

I really like the details Charlie put on the front and side door of his shop.  It's like stepping back in time with the old-fashioned look. 


Inside of the blacksmith shop.

One of many projects he is currently working on, a cannon.

Many tools hanging from the ceiling.


Contributing to a Sustainable Local Market

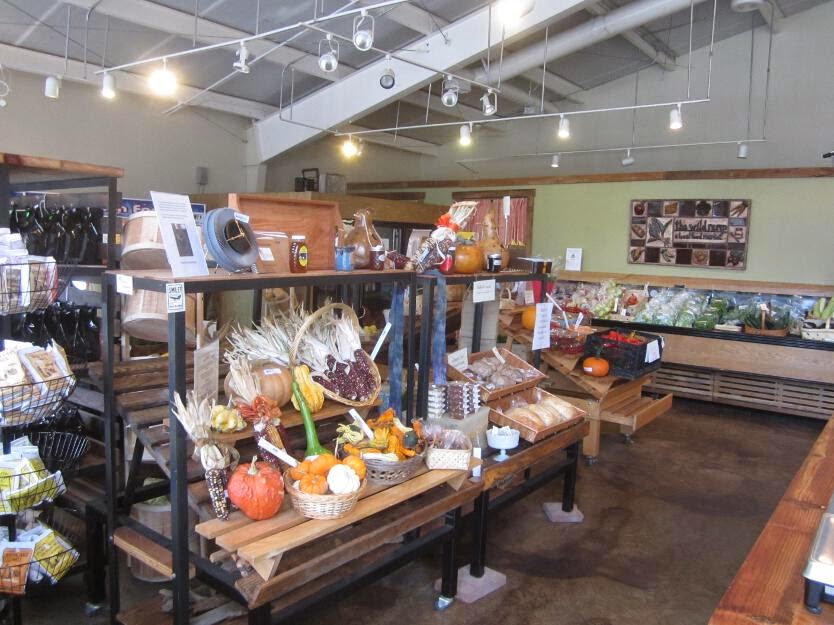
Beginning mid-October this year I started volunteering and selling items at the Wild Ramp, a local food and artisan store selling products grown and made within 250 miles of the store in Huntington, WV.  The Wild Ramp is like an indoor farmer's market where farmers personally drop off their produce and talk with customers; and where handmade artisan products are sold by local community members.  There are only three paid staff members at the Wild Ramp so the store relies heavily on volunteers to keep things going on a weekly basis.  I have been told for several years that Jon and I should sell our handmade toys and wood items that we make.  I always assumed that people wouldn't buy our stuff because of the price we have to charge to make it worth our time.  Well, come to find out, people are willing to pay and it seems that I can't keep up with the demand!  I included a few pictures of items I am currently selling.  Producers pay a $15.00 fee per month to reserve shelf space and receive 90% of the profits.

With the holiday season, I put together a few centerpieces made with holly, pine cones, dried berries, and pine boughs from our woods. 

I have been making holiday wreaths for five years now and they are super easy to make so I made a few to sell.  Like the centerpieces, I gathered supplies in the woods and even tucked a few turkey feathers in the greenery from a friend who raises turkeys.  This was my first year making bows with the help from youtube.

I made a mushroom rattle as a baby gift for a friend four years ago and they were so cute that I made more of them and expanded the rattle design to apple trees and ladybugs.  In less than a month, all of the mushrooms sold!  

On the top shelf in this picture are a bunch of my wooden toys that are really popular at the Wild Ramp.  To see the toys better, click the picture to enlarge.  In one month, I sold all but two of the cars on that shelf and even had a special order for two of the dump trucks.  Like the rattles, I continue to make more and restock the shelf on a weekly basis because they sell out quickly!

Most producers include specific information about their items and where they are located so customers feel more informed about the product.  For instance, meat and dairy products have labels for grass-fed only, grain-finished, free-range, non-GMO feed, etc.  For my toys I tell customers that I use re-purposed wood and seal it with a child-safe linseed and beeswax finish.

These log stools are really cute and modeled after the traditional milking stool.  The logs are gathered from our property.

We are also selling bag drying racks with the message, "Don't throw away your Ziploc bags!  Wash and hang them to dry on this rack."

Overall, volunteering and selling my wares at the Wild Ramp has been a productive use of my time while Paul is in full-day Kindergarten.  Whether it's seeing a customer get excited about my wooden toys or talking about different chicken breeds to the farmer who sells eggs, I have so much fun just being at the Wild Ramp.  It's a place where you feel part of the community and are surrounded by like-minded people. 


Canning Carrots and Using a 41 Qt. All American Canner

The day started with only one simple task: preserve carrots.  Little did we know how much of an undertaking this was going to be...

This year we were a bit over-zealous with the carrot patch.  Last year, all of our root crops rotted with all the rain.  Thankfully we had enough jars left from the previous year that we managed to have enough carrots to last us through winter.  The idea of preserving a little extra because of next year's uncertainty is something I find very important in homesteading.  
This year's varieties: Danvers, Dragon, and St. Valery

Pulling root crops is so satisfying---you just never know how big the carrot will be!

There is a dual benefit to using the broadfork at this stage.  It helps find carrots that were missed during the first picking and it loosens the soil for buckwheat planting.  The soil doesn't stay bare for long!

That's a lot of carrots...

For Mother's Day this year I received the Bron Mandolin and a pair of cut resistant gloves.  While I cleaned the carrots, Jon cut them, and Paul put them in bowls.  Thank goodness for the help...a lot of work for one person!

This year Jon splurged and purchased the All American 41.5 quart liquid capacity canner.  There are many aspects about this canner we like: 
1. Made in Manitowoc, WI  
2. No rubber seal to replace  
3. It can process 19 quarts and 32 pints at one time!  

For six years I have used a seven quart canner, but Jon wants to save time in the kitchen and keep the heat from the canner outside during the hot, humid days.

The only negative aspect about this canner is its sheer size and inability to fit on my current glass-top stove. We threw around the idea of an open fire, but that adds an entirely different challenge with keeping pressure constant.  Jon and I would prefer not to use propane but short of getting a new range our choices were pretty limited.  In the future, we would like to have an outdoor kitchen with a sink hooked up to a grey water system and an old stove just for canning.  Until then, we are using the current set-up. 

It was a long grueling 13 hour day of processing carrots from start to finish.  Paul was a great helper and found ways to entertain himself.  This kid loves to build and design structures like this carrot castle!

I prefer to push through large projects in one day rather than extend them into the next day.  It was satisfying to wake up the next morning to all 73 quarts sealed waiting to be wiped down and stored.  

I think we have enough carrots to last us awhile, don't you think?  A few weeks ago Jon planted 2 rows of Solar Yellow Carrots for a fall harvest.  Jon just can't resist trying new varieties!  *sigh*  I think Jon and I can agree upon one thing: only plant carrots for fresh eating next summer. 


Making Potholders & Oven Mitts the Easy Way


I finally wrapped up one of my winter sewing projects!  I made several oven mitts and potholders for myself and friends.  The fabric used for this project were leftover scraps from previous projects.  

When looking for batting, I was excited to see the Pellon brand with the "Made in the USA" label!
When selecting batting, you have many types to choose from, including batting with heat resistant foil.  The foil batting can't be put in the microwave, and not knowing what my users will do with their mitts and holders, I used the 100% batting without foil.  For $14.00 I made 6 mitts and 4 holders with some batting leftover.  


The starting dimension of the potholder was 7.5 inches square.  Three pieces of batting were used for each potholder.  I made a pair with only two pieces of batting but thought they were too thin. 


Adding a design is completely optional but I enjoy hand aplique so I added the cherries and grape cluster.  When adding the design, attach one layer of batting to the fabric so the designs are anchored really well.  If you don't add a design, you can sew diagonal lines like I did for the oven mitts (shown below).

I absolutely love how the cherries turned out!

Looking back I should have added a vine tendril to the grape cluster. 

For the binding, I cut the strips 2.75 inches wide.  This is my second attempt at putting on binding, but this video explains the process.  I used a zig-zag stitch to secure the binding.  

Finished!

OVEN MITTS:

For the oven mitts, I made a pattern by tracing an oven mitt that I already had and added about an inch around the perimeter to account for the seam.

For one oven mitt, I cut four pieces of fabric because two of the pieces will be the lining for the inside of the mitt.  You don't have to use the same fabric for the lining.

Four pieces of batting were also cut out.  Two pieces for each side of the mitt.

To assemble the mitt, see picture above.   There are four layers of fabric for each half of the mitt.

To secure all four pieces of fabric, sew diagonal lines 1.5 inches apart.  I used a washable fabric marker to mark my lines for sewing.

When both halves of the mitt are sewed, trim the edges.

For the binding at the bottom of each half, I cut two strips, 2.5 inches wide and 6.5 inches long.  The width of my oven mitts at the bottom are 6 inches but I add an additional half inch for wiggle room.

For each binding strip, with wrong sides together, iron in half.

Then open it up and bring one side to the center fold and iron, 

and then fold the other side to the middle and iron.

Put the binding on the mitt and sew.

With right sides together, face both oven mitt haves together and sew about 1/4 inch in from the sides.  At this point you are sewing 8 layers together.

If you turn the mitt inside out, there will be a lot of puckering around the thumb.  To alleviate this, trim the excess in the thumb area really close to the stitching.  To reinforce the stitching, it's a good idea to sew the thumb area a few times.  Trimming the excess around the entire mitt is a good idea to reduce the bulk.

Here are two finished oven mitts ready for gifts!  I didn't add the little hanger loop at the base of the mitt but that's an additional detail you can choose to add.

About this blog

A weekly update on our adventures of trying to be more self-sufficient by using resources wisely. We explore a variety of topics that most broadly fit in the "Homesteading" category, i.e. beekeeping, organic gardening, edible landscaping/fruit forest, food preservation/canning, woodworking, soap-making, and environmental stewardship.

Search My Blog

I've been featured on:


Followers

Facebook

Contact Form

Name

Email *

Message *

Powered by Blogger.