Simply Resourceful

Simple ways to be more conscious about how we use our resources.

Vanilla & Almond Extract

If you're an avid baker like me, then you use a lot of vanilla extract throughout the year.  In the past I would bring my own bottle to the store and fill it up in the bulk section, but that is expensive; and imitation vanilla....nope, not in this house!  One day I decided to make my own!  Here's how you do it:

To make vanilla extract, you will need:
12 ounces of vodka or rum
2 vanilla beans (sliced and cut into 1-2 inch pieces)

*I recommend going to a food co-op or natural food store to purchase the vanilla beans in the bulk section.  You will pay about $2.50 per bean.  The beans should be long and somewhat moist with a strong aroma.  If you go to a regular grocery store, they are typically sold in a skinny plastic tube and they are much shorter and somewhat dry. *

In a bottle, add the sliced and cut vanilla beans to the alcohol.  Every couple of days, shake the bottle.  Store the bottle in a dark place.  After a couple of months, the extract is ready to use.  I've read everywhere from 6 weeks to 6 months for fermentation.  The longer the mixture ferments, the stronger the flavor.  The beans can always be kept in the jar(s) to intensify the flavor even when the fermentation is finished.  Some people keep adding more alcohol to the beans and continue the fermentation process because the beans still have more "juice" left.

I have made vanilla extract with vodka and rum.  I prefer the vodka because the rum smell never seems to go away no matter how long the extract ferments.  Just a personal preference, that's all.

I enjoy this extract so much, that I give it away as gifts!  It sounds silly, but some people really do enjoy these kind of quirky practical gifts.  I purchased one dozen, 4 ounce jars from Mountain Rose Herbs located in Eugene, OR.  These are the perfect size for gifts.  To give it that added touch, I made cute labels.

To make almond extract, you will need
2 cups brandy or vodka
4 oz. peeled, blanched almonds.

1. To blanch almonds, pour boiling water over the almonds in a bowl.  The water should cover all of the almonds.  Let the almonds sit for 1 minute, no longer.  Drain the hot water, rinse the almonds with cold water, and rinse again.  Pat dry and slip the skins off.

2. After the almonds are blanched, grind them up very small. (I used a food processor.)

3. Add the alcohol and ground almonds to a bottle.  Shake the jar every couple of days and store in a dark place.  The amount of time needed for the fermentation is the same that I wrote about vanilla extract.

The bottle on the left is vanilla extract and the bottle on the left is almond extract.  You can see the almonds and vanilla beans sitting on the bottom of the bottles. 


These are the 4 oz bottles that I use for gifts.  

These are vanilla beans.  The bottom bean is 7.5 inches long!

These are the labels I attach to the jars for gifts. 


Conservation Classroom Presentations

Part of my job as a Resource Conservation Manager for a school district is working with students.  With school budgets shrinking, there are fewer teachers and assistants to help coordinate staff and student Green Teams.  It's sad really, because teachers don't have the time to talk about recycling or energy conservation when they have no staff support.  Because of this reduced time, I am often used as a babysitter (for lack of better words) so the teacher can grade papers or whatever.  When teachers aren't actively participating in the presentation, some students put in less effort and goof around and disrupt the class.  From a presenters standpoint, it's inconsiderate of the teacher to not discipline the students and it's a waste of my time.  I push forward though and still visit classrooms with only a few being bad eggs.  For the 2011/2012 school year, kindergarten classrooms average 28-32 students and a high school classroom class size averages 37-45 students.  Teachers really do feel stretched and having outside presentations takes away from extra tutoring time with students.  A friend recently asked me to post information about my presentations.  Below you will find powerpoints, presentation outlines, coloring sheets, and games.  Some of you may feel inspired and use the materials, but please let me know if you do use them (general courtesy to the creator's time and generosity).


Pedal Power
This presentation is by far the most popular request from teachers.  I have even taken it to conferences and after school programs for other school districts.  I created this bicycle generator from scrap materials found on school district property.  Only the wires, voltage meter, and plywood were purchased to complete the ensemble.  Even the motor was taken for an old floor scrubber being scrapped for parts.  Because this project was virtually free, it only conducts DC power (AC power would require an inverter which costs a lot of money).  Here is an outline of the presentation.

This hands-on presentation is mainly for 4th, 5th, and 6th grade students.  Students are given energy efficiency and energy source workbooks provided free from Energy Star (www.energystar.gov).  All students have an opportunity to ride the bicycle that generates electricity to a fan, a pair of lights, and a water pump.  I made posters for the energy sources and ways to conserve.  I cover up each item on the posters and have the students guess the correct answer.  The presentation covers: 
-how electricity is made
-where our energy comes from (renewable vs. nonrenewable resources)
-why it's important to conserve energy
-examples of how to conserve resources

Join the Lorax!
This 20 minute presentation for grades K-2 is based off the book, The Lorax by: Dr. Seuss followed by a book discussion and ways we can help the environment.  Energy Star (www.energystar.gov) graciously provides Lorax-themed posters and activity books free of charge through their website.  These are given to classrooms as a reminder about the book and how to help the environment.


    Be a Recycler!
This presentation is for grades 2-3 and teaches: 
-The 3 R's
-Why we recycle
-What can and cannot be recycled
-Examples of how we can reduce our waste
-Disposable vs. durable matching game


Here are some coloring sheets I give students.


Eco-Footprint
This presentation is for middle and high school students.  Students are given a worksheet a few days before I come to their classroom.  I show a powerpoint, and then do a family feud game. The powerpoint addresses these main points:
-Difference between non-renewable and renewable resources
-Definition of sustainability
-World population and consumption by region
-Lifecycle analysis
-Prevention vs. recycling
-Solid waste hierarchy
-Reducing waste and making choices
-Inspiring others to reduce their waste


The Buzz on Bees and Pollination
The honey bee presentation is not work-affiliated but very popular among the younger students learning about bugs and pollination.  This past week I had the pleasure of presenting to an after school class. Students really enjoy seeing me dressed in my coveralls and head net.  I pass around my smoker, bee brush, and a frame of drawn comb with capped honey.  Each student can dip a pretzel in a jar of honey to eat.  To keep things simple, the power point slides do not contain a lot of words.

Coloring Sheet
Color Sheet 2


Plastic Bag Ban

Finally, the City of Portland, Oregon has officially banned plastic bags in groceries and major retailers with pharmacies.  I have been waiting for such an ordinance for quite a while, and as of October 15, 2011, plastic bags won't be allowed in stores (with exceptions for meat and bulk items).  This new law seems too good to be true, but I really hope retailers charge more for the paper bags because they do cost more to purchase and paper bags have a larger carbon footprint than plastic bags.  I don't think I need to elaborate on why mandating reusable bags is important.  By now we should all know the effects plastic bags have on our oceans and the obvious fact that plastic is made from oil.  For more information about plastics and its effects on ocean life, go here!


I have been following the Ban the Bag for months now and I am disappointed how close-minded some people are.  Blogs and newspaper editorials complain that the lack of plastic bags will leave a person in complete turmoil when picking up their dog's poop, lining their trash can, or transporting their wet swimsuit. C'mon on, really?  I finally ran out of single use plastic bags from the grocery store after 10 years of using cloth bags.  I use the plastic bags from toilet paper for trash cans and cereal bags for kitty litter.  When you look around, you will see single use bags everywhere besides at the grocery check out.  Think chip bags, newspaper bags, shipping bags, etc.  I am very excited about this new law and hope that the mass majority will jump on the bandwagon of using cloth bags rather than the paper alternative at the check stands.  If anything, a few soggy broken paper bags from carrying ice cream and butter will convince shoppers that cloth is much more durable.

Here are few news articles and videos about the new law:
http://www.kgw.com/news/local/Portland-plastic-bag-ban--131667593.html
http://www.oregonlive.com/portland/index.ssf/2011/07/portland_adopts_ban_on_plastic.html
http://www.nwcn.com/home/?fId=131926688&fPath=/news/local&fDomain=10202
http://www.katu.com/news/local/125989558.html

2011 Harvest List

Here is my 2011 harvest list.  I indicated next to each item where the fruit or vegetable came from.

Strawberries: 2 gallon freezer bags, fruit leather, 1 pie (grew)
Rhubarb: 2, 9x13 pans of rhubarb crunch (grew)
Blackberries: 10 pints blackberry jam, 5 gallon carboy of mead (gleaned in public area)
Blueberries: 8 pints blueberry pie filling, 2 gallon freezer bags, blueberry muffins (grew & gleaned in woods)
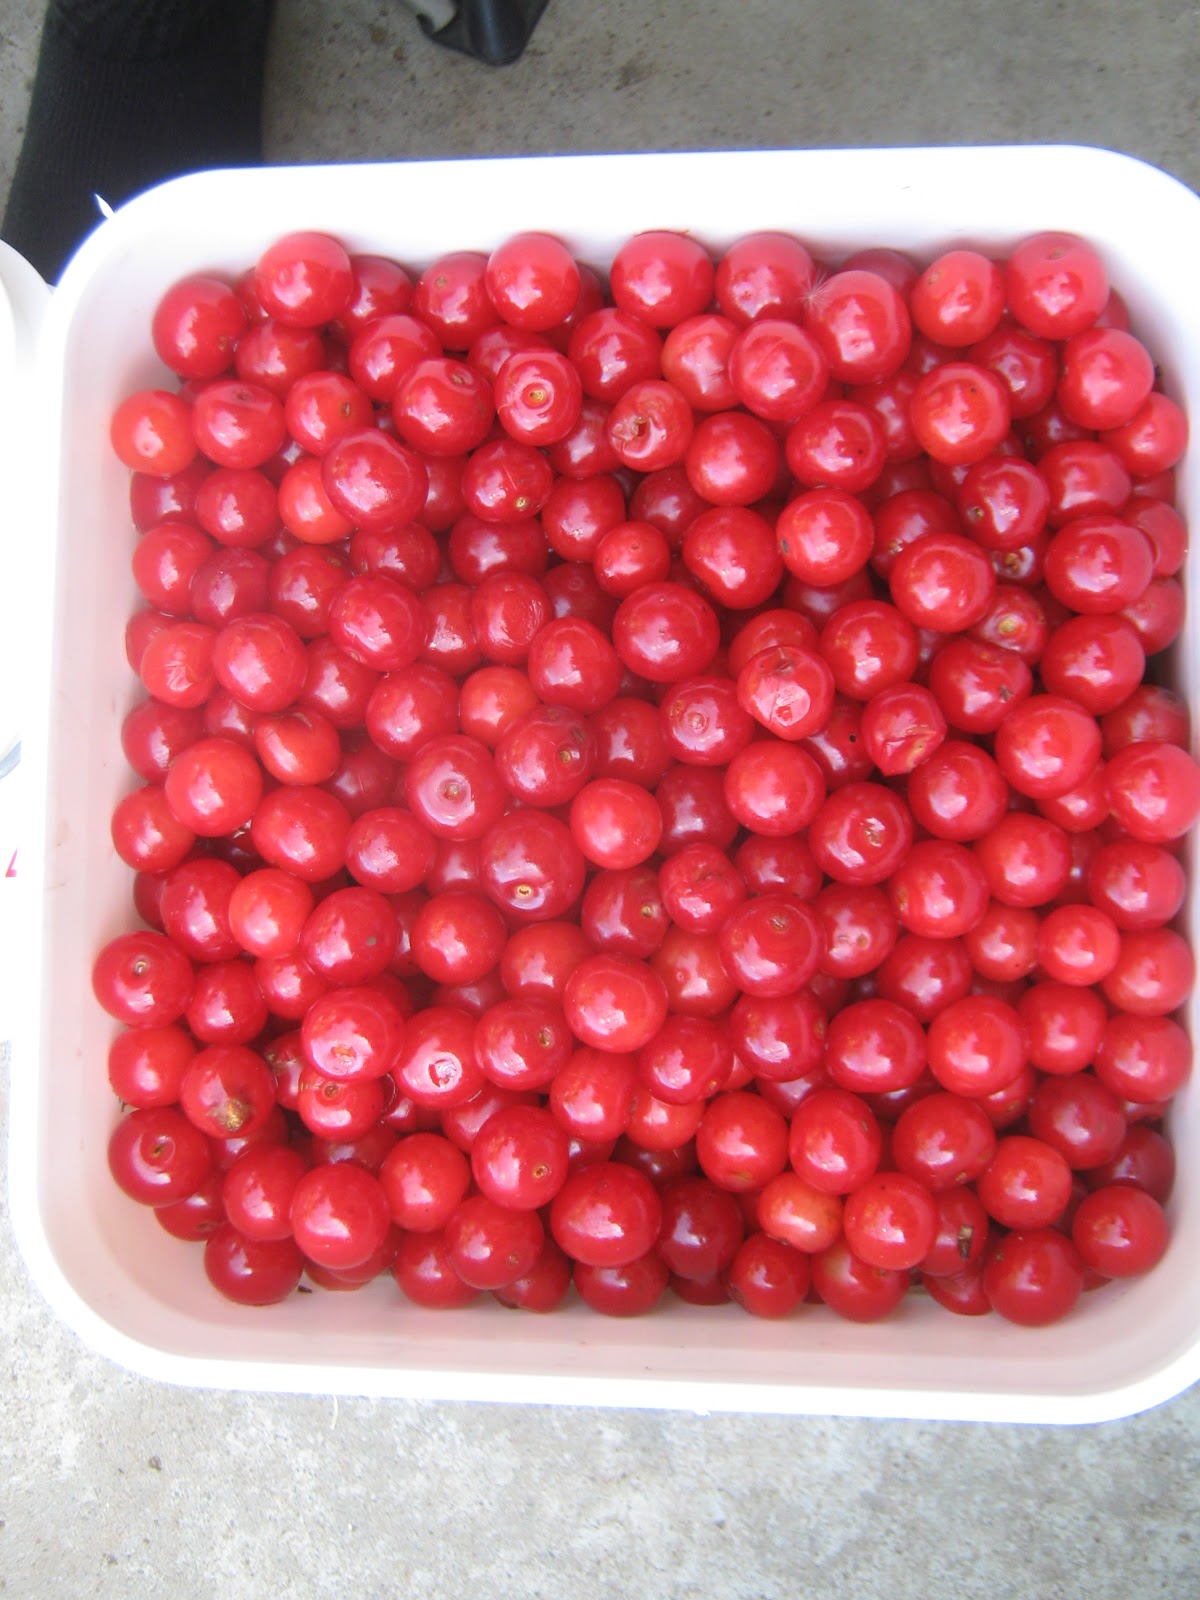
Cherries: 26 pints pie filling, 9 half pints jam (u-picked at farm)
Peaches: 7 quarts canned in syrup (bought)
Beans: 34 quarts (grew & bought)
Asian Plums: 1/2 gallon of plum wine (gleaned from friend's tree)
Tomatoes: 11 pints tomato soup, 25 quarts stewed, 7 quart bags in freezer, 15 pints salsa, 8 half-pints tomato paste (grew and bought)
Apples: 7 quarts applesauce, 2 jars dehydrated apple slices, 7.5 pints apple pie filling, 11 quarts apple cider, apple crisp (gleaned in public area)
Grapes: 6 quarts & 1 pint grape juice (grew)
Pears: pear crisp, 17.5 quarts pears in honey syrup, 12 half-pints pear butter, 4 half pints pear honey, 4 gallons Perry wine (gleaned in public area)
Carrots: 8 quart freezer bags full or sliced carrots (grew)

This summer Jon got really ambitious and made homemade berry soda. Here's a list of varieties we made:
Peach
Blackberry
Blueberry
Cherry
Sparkling cider

Total cost for all of the above food=$157.00 (that's even adding an extra $30.00 for miscellaneous things like sugar, peppers, and cornstarch).  I didn't have to purchase any jars this year, and surprisingly I still have 3 dozen left.  There isn't an accurate way to track the cost of canning lids because the Tattler lids can be reused.  This summer was by far the best for foraging and gleaning!  Jon and I are both good apple and pear tree scouts now and see them everywhere we go.  Every time I find a tree in a public area my heart jumps; I get so excited with the idea of preserving more things for free and knowing that the fruit won't fall on the ground and rot.

Some of you may notice the various pie fillings that I made this year.  I made plenty for when we go camping and cook Hobo Pies over the fire.  The pie filling can also be used for making turnovers and pie in a jar gifts!

Below are a few pictures of my preservation adventures!

Cherries

Apple Pie Filling

Dehydrated Apple Slices

Apples


Pears

Tomato Paste

Salsa

Grapes

Pears

5 gallon carboy of blackberry mead

Carrots from our garden.


Making Pear Juice and Pear Butter


I am not someone who collects a lot of gadgets, but this, my friends, is incredible!  This is the Norpro Juicer and Steamer.  This is by far the easiest way to make juice from grapes, pears, apples, etc.  The instruction/recipe booklet even says it can be used for making tomato paste.  You simply put the fruit in the top steamer basket; juice runs into the second pot where it is then siphoned off into jars; and the bottom pot is full of boiling water.  The tiered system works flawlessly, and the fruit mush that is left in the basket can be mushed up and used for other things or just composted.  I made grape juice with this and I didn't even remove the stems.  This system is a time saver!  Below are a few pictures from my pear endeavors!  We used the juice for making wine and the remaining pulp was made into pear butter!

Pears loaded into the steamer.  I only removed the stems and bruised or wormy parts of the fruit.  Pears were cut into quarters.

Here is my basic set-up.  I prop the soup pot on a chair and cake pan to catch the juice. 

I squeeze a little metal clasp to open up the tube and the juice drains into the pot. 

On the left is the steamer full of mushed fruit with little or no juice left.  On the right is an old-fashioned tool for mushing fruit to make sauce.  I don't know what this is called??  Help, anyone?

Using a wooden pestle, the fruit mush is pushed through the holes, leaving behind the seeds and skins. 

Here is the pear mush ready for pear butter!

Pear Butter Recipe: 
8 cups pear pulp
1 orange (rind and juice)
1 lemon (rind and juice)
2 cinnamon sticks
4 whole cloves
1/2 tsp. ground ginger
5 cups sugar

Mix together and cook on stove for about 30 minutes over medium-high heat, bringing to a boil, until mixture is the thickness you like.  Fill pint and half-pint jars and process in water bath for 10 minutes.  Makes ~11 pints

Some people use a crockpot and cook the mixtures for several hours.


Varroa Mite Checks

Before I button-up the hives for the fall, I conducted varroa mite checks on my two hives.  Varroa mites are parasites that attach themselves to honeybees and basically live off them until they die.  If mite populations are high, they can quickly deplete a hive, especially in the winter.  Conducting a mite check is very simple: spray a white corrugated sheet of plastic with oil and placed it under the hive for three days.  Honeybees have very good hygiene and they groom the mites off of each other's bodies and the mites simply fall out of the hive and onto the white sheet of plastic. 

The results: 
Blue hive: 113 mites
White hive: 26 mites

These numbers are definitely not good in the fall of the year.  9 times out of 10, disease kills a hive before spring if the colony is not strong enough.  Funny though----I performed a mite check on August 19th, only a month ago, and the mite numbers were 27 & 21.  This is proof how fast these parasites multiply and how quickly they can decimate a hive. 


(When I purchased this hive, it conveniently came with a slot that the mite board could slide into.)

(Pulling the mite board out...)

(This is what the mite board looks like after three days of being under the hive.  On the board there are bee parts, dead spiders, pollen, dirt, earwigs, and mites.)

(In the very center of this picture is a varroa mite.)

(This picture shows what I see up close.  How many mites can you see in this picture?  I see 17!)

(This is what a varroa mite looks like under a microscope....gross...)

There are many ways to treat honeybees with varroa mites.  One method is dusting the bees with powdered sugar to encourage grooming.  I totally intended to do this but forgot the powdered sugar after opening the hive.  I also made mite patties.  These patties are basically 1 cup vegetable shortening mixed with 1/2 cup powdered sugar.  Other beekeepers recommend using Honey-B-Healthy, so I added a capfull of that to the mixture as well.  Mix everything together and place a patty onto waxed paper, face-up on top of the frames in the hive.  The honeybees will want to remove this patty from the hive (and sometimes will eat it), and in the process get it on their bodies which will  encourage grooming.  The patty has oil in it which is also supposed to make it more difficult for the mites to cling to their bodies. Honey-B-Healthy is like "bee medicine" that contains lemongrass and other essential oils.  Unfortunately it also contains sodium laurel sulfate which I didn't realize was in it until after I purchased it.  That additive deserves a blog post all by itself, but it's on my list of "do not have in my house."


In addition to the mite patty I decided to feed the bees.  Most beekeepers give their hives a big dose of sugar water in the fall to make sure the bees have enough food stores for the winter.  My hives did produce some excess honey this year but not enough to extract (that's a messy job for only 5 frames of honey).  I left this honey in the frames and will give it back to the bees in the spring instead of keeping it for myself.  If I had extracted honey, then I would use the honey in the feeder in place of the sugar water that I mixed up.  The picture above shows the feeder being filled with 2 cups sugar dissolved in 2 cups water with 1 tsp. Honey-B-Healthy mixed in.  The bees crawl up through the hole in the center of the feeder and cling to the feeder walls and that plastic cup.

(The feeder lid is now on to keep bees from falling into the syrup.  You may wonder why the inside of the hive cover is black.  It's from the scorching I did in the spring. 

In a few days the feeder will be empty, and in a few weeks I will perform another mite check to see if what I did helped the bees in any way.  Beekeeping for me is like walking a tightrope.  I want to help my colonies survive, thrive, and produce a lot of excess honey, but I also don't want to feed them gallons of sugar water every spring and give them chemicals for disease treatments.  I want to have strong honeybee genetics and produce bees with strong immune systems.  By using chemicals, beekeepers are only producing stronger mites and other diseases.  Am I making sense?  Anyway, I'd be interested to hear other people's perspectives on this so leave your comments below!


Canning Tips

In the past 2 years I have taught a few friends how to can and I always offer a few tips along the way.  If you have some tips you would like to share, please post them in the comment section below!

1. Preparation:  If you plan to can the following day, clean the kitchen the night before.  Have your jars and lids washed and ready to go, or have them in the dishwasher ready to wash.  I find it motivating to wake up and see countertops free of clutter, no dirty dishes, and the canning pot already on the stove.

2. Keep a log: Good record keeping is a must.  I put together a 3-ring binder with labels this past winter.  I can easily find how many pints of tomato soup I can make with 8 pounds of tomatoes without scanning electronic documents, flipping through my recipe box, or looking at scribbles in the margins of my canning book.  This preservation log is a time saver and ensures accuracy.

3. Wear Comfortable Shoes:  This sounds silly, but it is actually really important.  Don't try to mimic the 1950's housewife pictures where women wear dresses and high heels in the kitchen.  I wear my walking shoes and old clothes because spills and splatters do happen.  Boiling water does drip onto my shoes when I'm moving the canning pot lid from one place to another.  I spend hours on my feet everyday and need to give my back proper support with a comfortable pair of walking shoes.

4. Sterilize Extra Jars:  I was just recently thanked by a friend for offering her this advice.  Even though a recipe states 9 pints, always wash a few extra jars.  Recipes waver and you don't want to delay process by 30 minutes because you have to dig out more jars (or go to the store and get more) and wait for the lids to sit in warm water.

5. Give Yourself More Time:  If you have a 5pm BBQ, don't begin peach canning at 2pm.  Canning is supposed to be enjoyable and not under the tight limits of time.

6. Have Plenty of Clean Towels and Washcloths:  There are always spills to wipe up, whether it be water from the canning lid pooling on the stovetop or tomato soup running down the jars.  I always have a pile of clean towels on-hand because I don't want to be washing jar rims with the same washcloth I washed my son's face with.  Before the day is done, there will be towels hanging over the laundry room sink drying from all the spills.

7.  Water Conservation: Let's face it, canning uses a lot of water: washing vegetables, washing jars, soaking lids, blanching, canning pot, washing hands, etc.  I try and redirect as much water as I can to my garden rather than down the sink.  Of course, always wait for the water to return to room temperature before applying to the garden so we don't kill any beneficial bugs or root systems from the boiling water. Through the years I have found two other uses for the boiling water from the canner and blanching pot.  I will pour the boiling water on the jam covered pot and utensils (the easiest way to clean the sticky mess, believe me!).  The second trick is pouring the scalding water down a drain in the house that may be a little slow to help clean out the pipes and get things moving (be sure it's safe if you have PVC pipes and make sure nothing is touching the pipes under the sink).


Since I mentioned tomato soup in two of the above tips, I decided to include my recipe:


1 peck tomatoes (12 pounds)
3 large onions or 6 small
3 peppers
1 small bunch celery (or 4 large stems)

Mix together all of the vegetables in a large soup pot.  Cook over medium-high heat until vegetables are soft, making sure to stir to prevent burning.  When vegetables are soft, puree them using a stick blender or transfer them to a blender for a smooth consistency. Add dry mixture and blend to ensure no lumps.

Dry mixture:
            1 cup sugar
            1 cup flour
            about 1/3 cup table salt


Can and seal: pints, 10 minutes at 5 pounds

Makes about 15 pints. 


***I don't bother removing the skins on my tomatoes because everything gets blended into a puree and I personally don't notice a texture difference.  I also think there's a higher nutritional benefit to leaving the skins on.  If you don't want skins, blanch them...a lot more time though...***


About this blog

A weekly update on our adventures of trying to be more self-sufficient by using resources wisely. We explore a variety of topics that most broadly fit in the "Homesteading" category, i.e. beekeeping, organic gardening, edible landscaping/fruit forest, food preservation/canning, woodworking, soap-making, and environmental stewardship.

Search My Blog

I've been featured on:


Followers

Facebook

Contact Form

Name

Email *

Message *

Powered by Blogger.